
What is a filter?
A filter in Bommer for SOLIDWORKS is a rule that dictates what rows should be shown in the table or the exported BOM. Bommer has some built-in filters (such as filtering items that are marked as Exclude from BOM), a handful of quick filters, and can support custom filters that are defined using the properties you have configured in Bommer (see Configuring your properties for more info). Bommer filters and their controls are accessed via the Filter button in the Bommer task pane window.
Where is the filter button?
The filter button is the Funnel button on the top of your Bommer live view.

Once pressed the button will give you all the associated filter options.
- Edit Filters: This button will open the edit filter window which will let you edit existing filters and create new ones.
- Combine Filters: This option will allow you to select multiple existing filters and have them be active at the same time.
- Invert Filter: This will invert your filter selection and show everything except for the criteria you were filtering on.
- Clear Filter: Clears any filters currently active. This does not delete the filter, just deselects it. This can also be achieved by clicking the funnel with a red x button that is next to the filter button.
- Filter by text: Will open a dialogue box and let you search for specific text within your BOM and will show you those rows.
- Filter by selection: This option hides all the rows from the live view and will show the row of data of any component that you select on your model.
- Show hidden components: Selecting this option will show you the components that have been hidden by your filter.
- Show root component: Displays or hides the root component (top level assembly) in your BOM.
Built-in filters
Bommer, by default, will filter rows for parts that are marked as "Exclude from BOM" within SOLIDWORKS. Additionally, Bommer will look at a subassembly's configuration and hide or promote it's children if the configuration is configured this way. These filters are on by default, but you can disable these filters by clicking "Show hidden components". When this is checked, all components in your model (regardless of whether they are marked as Exclude or are configured to be hidden) will display in the Bommer live view.
By default, Bommer will include the root component in the BOM: for a part, this is the part itself, and for an assembly, it is the top level assembly. SOLIDWORKS bill of materials tables do not typically include the root; if you do not want to view the root in your BOM you can uncheck "Show root component" to hide the root component.
By default, Bommer will include the root component in the BOM: for a part, this is the part itself, and for an assembly, it is the top level assembly. SOLIDWORKS bill of materials tables do not typically include the root; if you do not want to view the root in your BOM you can uncheck "Show root component" to hide the root component.
Quick filters
Bommer supports several "quick" filters you can use to quickly filter your data; these do not require much configuration (if any) to use. The first of these, "Filter by text...", takes in a text string and shows rows that contain that text in any configured property (the property does not need to be visible to match the text filter).
To use, press the "Filter by text..." button to open up the Filter by text dialog box. Type in the text you wish to apply as a filter:
To use, press the "Filter by text..." button to open up the Filter by text dialog box. Type in the text you wish to apply as a filter:

Once you press OK, the Bommer live view will change and reflect the new filter.
"Filter by selection..." is another quick filter built into Bommer. When enabled it will listen for selection changes within SOLIDWORKS and show only the rows that are selected.
These filters and the custom filters described below can be toggled on and off by clicking again on the filter menu item; filters can also be toggled off by clicking the Remove filter button next to the filters button.
These filters and the custom filters described below can be toggled on and off by clicking again on the filter menu item; filters can also be toggled off by clicking the Remove filter button next to the filters button.
Custom filters
The starting point for custom filters is the "Edit Filters..." option. To demonstrate custom filters, we'll create a new filter for our table.
Start by pressing "Edit Filters...".
Start by pressing "Edit Filters...".

This will open the Edit Filters window. If you have a filter currently active then it will default to that Filter, if no filters are active then it goes to editing a new Filter. If it's not already selected, select "New..." to create a blank filter.

Then, press the + sign button to add rules to the filter. This will open the Edit Filter Part window.
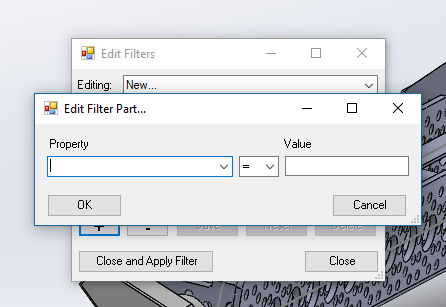
Here we have three parts. The property field on the left is where you select the property you wish to filter on. Once that is selected you select whether you want your property to = (equal) or != (not equal) whatever value you specify. Lastly, on the right is where you specify the value that the property must match for a row to pass the filter.

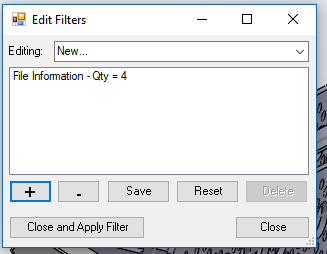
In this example we'll create a filter that will show us any rows of data where the quantity is equal to 4.
Deleting Logic in a Filter
To delete a filter rule from a filter, select the rule in the list that you want to get rid of and press the - button to remove it.
Once you are done setting your logic press the Save button. If you are editing an existing property then this will automatically save the changes to it, if you are creating a new property then it will open the naming window.
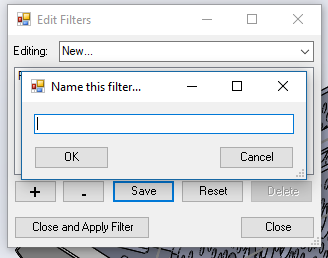
Enter the name Quantity 4 and then press ok. This filter has now been created and we see that it says Quantity 4 instead of "New..." in the Editing dropdown.
There are some additional buttons on the bottom of the Edit Filters window. Reset will revert any changes you have made to the filter between now and the last time that you have saved. Once you press save then this option will grey out.
The delete button will delete the currently selected Filter.
Once you are done editing your filter you can press close to close the Edit Filters window or press Close and Apply Filter to close the window and apply the filter to the live view.

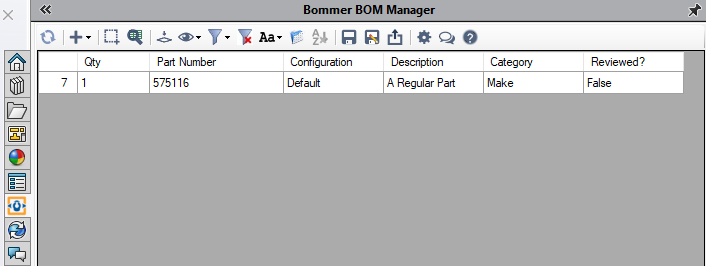
Here we see how our filter has changed the live view. It will only display the rows that meet the criteria.

Combining and inverting filters
When a filter is selected, a row is shown if it passes all rules defined within that filter. Bommer also lets you show rows that pass any of a set of filters. This is accomplished by pressing the Combine Filters button then selecting the filters you wish to activate.

In the above example, we would now see the rows that either the Make Filter or the Quantity 4 Filter. There is no limit to how many filters you can have active at once.
You can also tell Bommer to invert the filter, to reuse your filters in different ways without having to define new custom filters. This can be useful if you have filters for a specific subset of data (e.g. your machined parts made a specific vendor), and wanted to see your parts that are not machined, or not machined from that vendor. This can also be useful to turn "Filter by text..." into a filter that shows rows when text is not present in the property values. To toggle this setting, click "Invert filter" in the dropdown menu.
You can also tell Bommer to invert the filter, to reuse your filters in different ways without having to define new custom filters. This can be useful if you have filters for a specific subset of data (e.g. your machined parts made a specific vendor), and wanted to see your parts that are not machined, or not machined from that vendor. This can also be useful to turn "Filter by text..." into a filter that shows rows when text is not present in the property values. To toggle this setting, click "Invert filter" in the dropdown menu.
Comments
0 comments
Please sign in to leave a comment.